The Allure of Homemade Chocolate Granola: A Wholesome Indulgence
Imagine waking up to the rich, comforting aroma of cocoa mingling with toasted oats, wafting from your kitchen. That's the magic of homemade chocolate granola. Far from the often-overly sweet, additive-laden versions found in stores, crafting your own offers a delightful journey into a world of controlled indulgence. It's about savoring deeply satisfying flavors while knowing every ingredient is working towards your well-being. This isn't just breakfast; it's an experience – a healthy treat that truly satisfies your sweet tooth without compromise.
For years, many of us have settled for store-bought granolas, often disappointed by their blandness, excessive sugar, or unpronounceable ingredient lists. The shift to homemade has become a revelation for countless food enthusiasts, myself included. It was an accidental discovery, born from a desire for something better, something truly fulfilling. What emerged from countless experiments is a perfect balance: a chocolate granola that combines the luxurious taste of cocoa with the wholesome goodness of natural ingredients, resulting in those coveted, crunchy clusters that make every bite an absolute delight.
Why DIY Chocolate Granola Reigns Supreme
The decision to make your own chocolate granola isn't just a culinary preference; it's a conscious choice for health, flavor, and economy. Here’s why diving into the world of DIY granola is a superior option:
- Unparalleled Ingredient Control: This is arguably the biggest advantage. You dictate precisely what goes into your body. Say goodbye to mysterious preservatives, artificial flavors, and excessive refined sugars. Instead, you're embracing robust old-fashioned oats, nutrient-dense nuts, and natural sweeteners like pure maple syrup. This control means you can tailor the sweetness level to your exact preference, ensuring a truly healthy indulgence.
- Superior Nutritional Profile: When you craft your own, you're loading up on wholesome goodness. Oats provide essential fiber, nuts contribute healthy fats and protein, and cocoa powder offers antioxidants. This combination makes your homemade chocolate granola a powerhouse of sustained energy, perfect for starting your day or fueling an afternoon.
- Economical & Sustainable: Premium store-bought granolas can be surprisingly expensive. A single batch of homemade chocolate granola often costs significantly less than a comparable high-quality brand, yielding a larger quantity for your money. Plus, by buying ingredients in bulk, you can reduce packaging waste, making it a more environmentally friendly choice. For more on the economic benefits, check out DIY Chocolate Granola: Better Taste, More Crunch, Less Cost.
- Explosion of Fresh Flavor: Nothing compares to the taste of freshly baked granola. The aroma alone is intoxicating, and the flavor is rich, nuanced, and vibrant in a way pre-packaged versions simply can't match. The natural sweetness of maple syrup beautifully complements the deep, slightly bitter notes of cocoa, creating a sophisticated flavor profile that's hard to resist.
- Dietary Flexibility: Homemade is inherently adaptable. Need gluten-free? Use certified gluten-free oats. Following a vegan diet? Opt for dairy-free chocolate chips and ensure your sweeteners and fats are plant-based. This flexibility makes it ideal for households with diverse dietary needs or for entertaining guests with different preferences.
Crafting Perfect Clusters: The Science Behind the Crunch
The hallmark of truly great chocolate granola isn't just its flavor, but its texture – specifically, those coveted, crunchy clusters. Achieving these delightful clumps isn't magic; it's a science of balance and technique. Many home bakers struggle with granola that crumbles into dust, but with the right approach, perfect clusters are within reach.
The secret lies in the precise ratio of wet to dry ingredients. Too much liquid leads to soggy granola that never crisps properly, while too little results in a dry, loose mixture that won't bind. Our recipe hits that sweet spot, ensuring everything comes together beautifully. Key binding agents include:
- Maple Syrup (or other liquid sweeteners): Beyond sweetness, maple syrup acts as a crucial binder. Its natural stickiness, combined with caramelization during baking, helps glue the oats and nuts together. Brown sugar can also contribute to this effect, adding depth of flavor and aiding in cluster formation.
- Fat (Oil or Melted Butter): A good quality oil (like coconut or olive) or melted butter not only adds flavor but also helps crisp up the oats and promotes browning. It coats the dry ingredients, allowing for even heat distribution and contributing to that satisfying crunch. Some recipes also cleverly incorporate egg whites, which, when baked, create an incredibly light and crisp coating that further enhances cluster formation, adding an extra layer of structural integrity.
The baking process itself is equally important. A low and slow bake ensures the granola dries out and toasts evenly without burning. After baking, resist the urge to stir it immediately. Allowing the granola to cool completely and undisturbed on the baking sheet is paramount. As it cools, the sugars firm up, solidifying the clusters and locking in that irresistible crunch. Breaking it apart only after it's fully cooled will yield beautifully formed, intact clumps.
And for the ultimate indulgence? A delicate drizzle of melted chocolate after the granola has cooled. This optional step takes your already delicious creation to new heights, adding another layer of rich chocolate flavor and a luxurious visual appeal that makes it truly special.
Customization and Versatility: Beyond Breakfast
One of the most remarkable aspects of homemade chocolate granola is its incredible versatility. While it shines as a morning meal, its uses extend far beyond the breakfast bowl, making it a staple you'll reach for throughout the day. It's not just food; it's a canvas for culinary creativity and a consistent crowd-pleaser.
Endless Ways to Enjoy Your Chocolate Granola:
- The Classic Breakfast: Serve it with a splash of milk (dairy or plant-based) for a hearty start to your day.
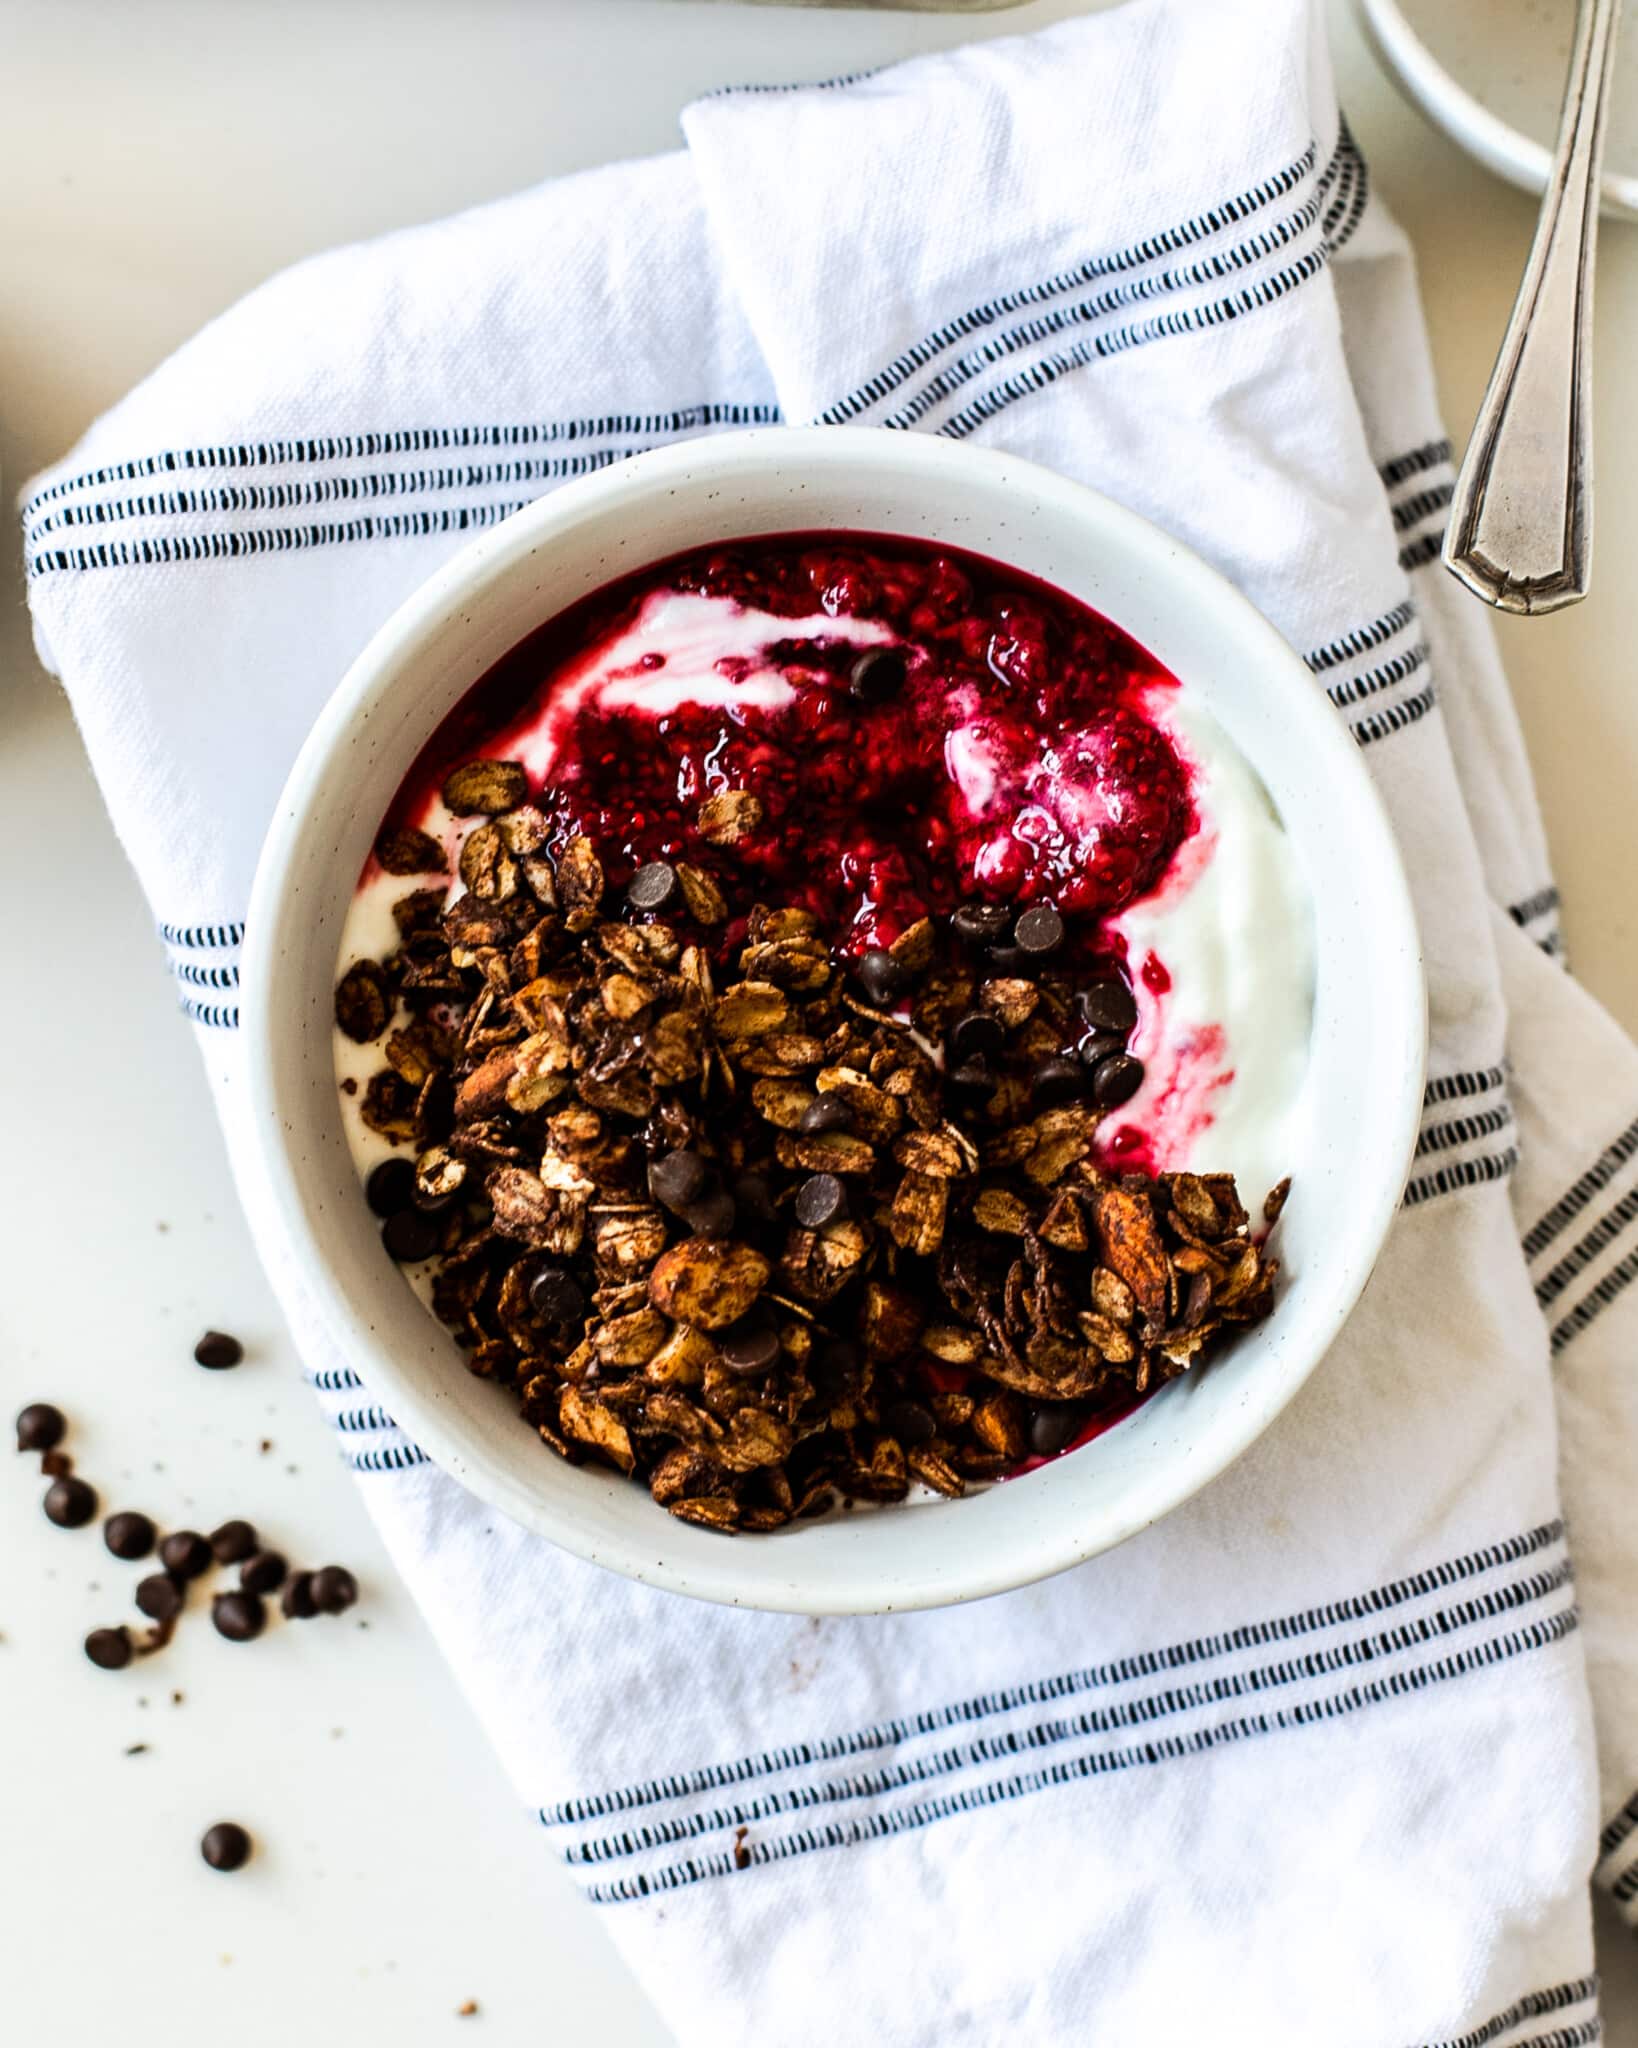
- Yogurt Parfait Perfection: Layer it with creamy yogurt and fresh berries for a vibrant, textured, and protein-packed meal or snack. The crunchy granola provides a delightful contrast to the smooth yogurt.
- Afternoon Power Snack: Grab a handful straight from the jar for a quick energy boost. It's far more satisfying and wholesome than most packaged snacks.
- Dessert Topping Extraordinaire: Sprinkle it over ice cream, pudding, or even fresh fruit for an added layer of crunch and chocolatey goodness. It transforms a simple dessert into something special.
- Elevated Baking Ingredient: Use it as a crunchy topping for muffins, quick breads, or even apple crisps.
- Homemade Trail Mix Component: Combine it with other nuts, seeds, and dried fruits for a custom, on-the-go snack.
Tailoring Your Batch with Mix-ins:
The beauty of homemade chocolate granola also lies in its adaptability to your personal taste and dietary needs. Once the base recipe is perfected, the fun begins with customization. Consider these additions:
- Nuts & Seeds: Experiment with pecans, almonds, walnuts, cashews, pumpkin seeds, sunflower seeds, or even flax seeds for added texture and nutrition.
- Dried Fruits: Stir in dried cranberries, cherries, raisins, chopped apricots, or even freeze-dried raspberries after baking to prevent them from burning or becoming too hard.
- Spices: A pinch of cinnamon, a dash of cardamom, or a subtle hint of chili powder can elevate the chocolate flavor to new, intriguing dimensions.
- Coconut: Toasted coconut flakes add a tropical twist and another layer of crunch.
- Chocolate Chips/Chunks: While the cocoa powder provides the primary chocolate flavor, mini chocolate chips or chopped chocolate bars can be folded in after baking while the granola is still warm, allowing them to melt slightly and adhere beautifully to the clusters.
For more ideas on how to make this treat incredibly versatile, read our article: Chocolate Granola: Your Versatile Treat from Breakfast to Dessert.
Tips for Your Best Batch of Chocolate Granola
While the process of making chocolate granola is delightfully simple, a few expert tips can elevate your results from good to absolutely phenomenal, ensuring every batch is a resounding success:
- Choose Your Oats Wisely: Always opt for old-fashioned rolled oats. Quick oats are too finely cut and will likely result in a mushy texture rather than distinct, crunchy clusters. Steel-cut oats are too dense and won't absorb the liquids effectively for granola.
- Quality Ingredients Matter: Since the ingredient list is relatively short, the quality of each component shines through. Use good quality cocoa powder for a rich, deep chocolate flavor. Pure maple syrup (not pancake syrup) provides the best natural sweetness and binding properties. Fresh nuts will offer the best flavor and crunch.
- Don't Skimp on Mixing: Ensure all the dry ingredients are thoroughly coated with the wet mixture. This uniform coating is crucial for even browning, consistent flavor, and proper cluster formation.
- Spread Evenly: Once mixed, spread the granola mixture in a single, even layer on a large baking sheet lined with parchment paper. Overcrowding the pan will steam the granola instead of baking it, preventing it from crisping up. If necessary, use two baking sheets.
- Bake Low and Slow: Patience is key. Baking at a lower temperature for a longer duration allows the granola to dry out and toast thoroughly without burning the delicate cocoa or nuts. Stirring occasionally (every 15-20 minutes) ensures even baking, but remember to press it back down after each stir to encourage clusters.
- Cool Completely Undisturbed: This is arguably the most critical step for achieving those perfect clusters. Once your chocolate granola is golden brown and fragrant, remove it from the oven and let it cool completely on the baking sheet on a wire rack. Resist the urge to touch or stir it! As it cools, the sugars firm up, solidifying the clusters. Breaking it apart only once it's fully cold (which can take an hour or two) will give you beautiful, chunky pieces.
- The Optional Chocolate Drizzle: If adding a melted chocolate drizzle, do so only after the granola has completely cooled. This prevents the chocolate from becoming dull or seizing. Drizzle it artistically over the cooled granola and let it set before storing.
- Proper Storage: Store your homemade chocolate granola in an airtight container at room temperature. It will maintain its freshness and crunch for up to two weeks. Though, in most homes, it rarely lasts that long!
Conclusion
Homemade chocolate granola offers a unique blend of indulgent flavor and wholesome nutrition, transforming a simple breakfast staple into a truly satisfying experience. From the intoxicating aroma that fills your kitchen to the satisfying crunch of each cluster, making your own chocolate granola is a rewarding endeavor that puts you in control of every delicious bite. It's a testament to the fact that healthy eating doesn't mean sacrificing flavor; it means embracing natural ingredients and the joy of creation. So, step into your kitchen, embrace the simplicity of this recipe, and prepare to elevate your mornings and snacks with a homemade treat that your family and guests will request time and time again.
